Objective
Connecting your Facebook page to your Jumper.ai account.
Applies To
- Sales channels
- Jumper
Procedure
With following some simple steps you can easily get connected to your Facebook page and manage your customers, sales etc,. via Jumper.
Note: Avoid using your official branding Facebook page while testing and running sample products, collections or bots for development, instead use the brand’s test Facebook pages or personal(alternate) page for the testing and development phase, so it doesn’t get mixed up with your official branding pages which can trouble live users.
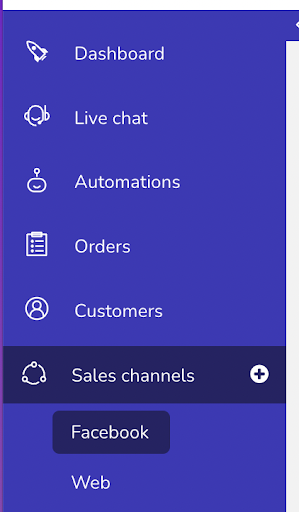
1. To start connecting your Facebook page to Jumper, go to Sales channels >> Facebook.
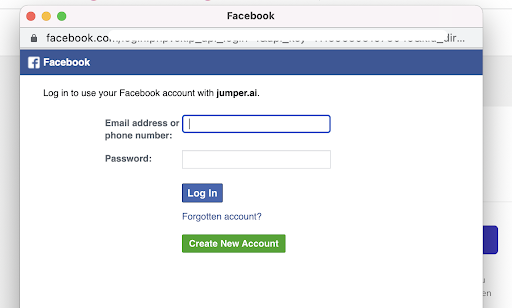
2. Here you will find the option to connect with your Facebook account, click on “Connect” to proceed.

3. Once you click on connect, you will find a pop-up to Log-In your Facebook account. Once you are logged-in you need to provide access to Jumper for your Facebook account.
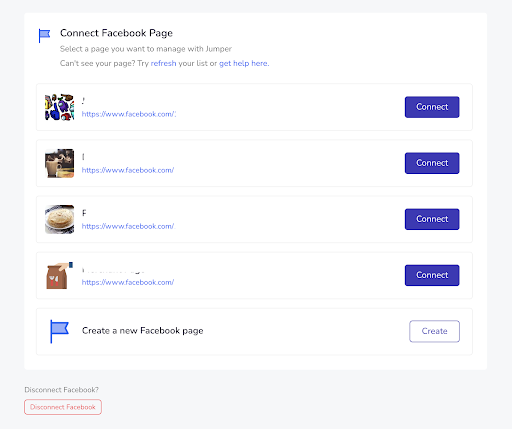
4. Once connected to a Facebook account, you will find the option to connect your account to your Facebook page.
Click on the “Connect” option to connect with your already created pages or click on the “Create” option to generate a new page for your account.
In case you want to switch your connected Facebook account for your store to another, simply click on Disconnect Facebook option and then connect to your other Facebook account.
Note: You can create a new Facebook page for testing purposes and connect it to Jumper account now and once you are done with the account setting, test runs and ready for the launch, you can disconnect your test page and connect the actual brand/store page.
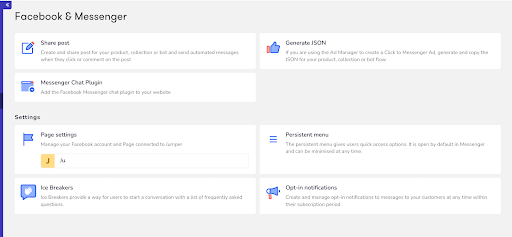
5. Once you have connected your page to your account, you will find the options such as Share Post, Messenger Chat Plugin and Generate JSON.
Under Settings you will find options for Page setting, Persistent menu, Opt-in notifications and Ice Breakers.
Articles in this section
- How to enable META Conversions API with Jumper.ai
- Setting up a Facebook Messenger Widget
- Facebook Recurring Notifications
- Setting up Click to Messenger Ads
- Setting up Persistent Menu on Facebook
- Facebook Page Status "Urgent Action Required"
- Facebook - N Time Notifications FAQs
- Facebook - Setting up N Time Notifications on Jumper.ai Dashboard
- Facebook - Introduction to N Time Notifications
- Sharing Posts on Facebook Page