Objective
Broadcast with A/B testing
Applies To
- Jumper
- Broadcasts (WhatsApp, Line, Messenger, SMS, Instagram, Telegram, GBM, Viber)
A/B testing, also known as split testing, is a marketing experiment to split the target audience to test variations on a campaign and determine which performs better. In other words, one can show version A of the marketing content to your audience and version B to the remaining to determine which version performs better.
Using Broadcast’s A/B testing feature,
- One can distribute the target customers into 2 parts: A and B
- Create different messages using supported message types for Version A and Version B.
- Broadcast the message to Target A and Target B users.
- Analyse the broadcast outcome and determine which version performed better.
Procedure
To create any broadcast with A/B testing, there will be 4 settings that will need to be configured in Broadcast:
- Messaging Channels: The channel where the Broadcast will be sent.
- Create Message: Enable the A/B Testing option; Select Broadcast distribution for A and B; and Create the message for Version A and Version B.
- Settings: Select the Target Customers who will be receiving the Broadcast using filters and conditions
- Scheduling: Schedule your Broadcast to be sent immediately or on a particular date & time.
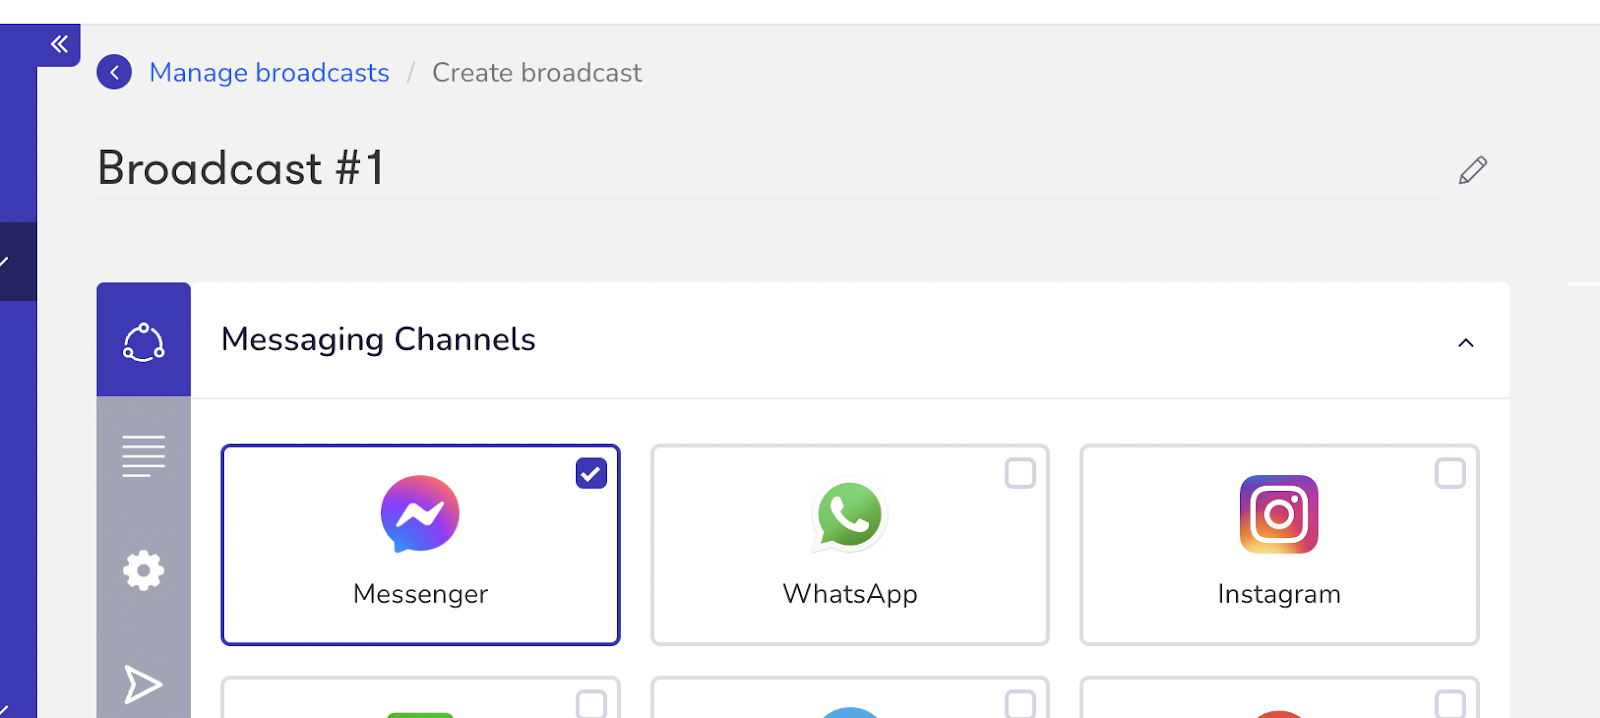
- First Navigate to Automations >> Broadcast in the menu.

- Now set a name for your Broadcast. In case you didn’t set a name, the name is added by default. e.g. Broadcast #01.
- Select a Channel under Messaging Channels for your broadcast.
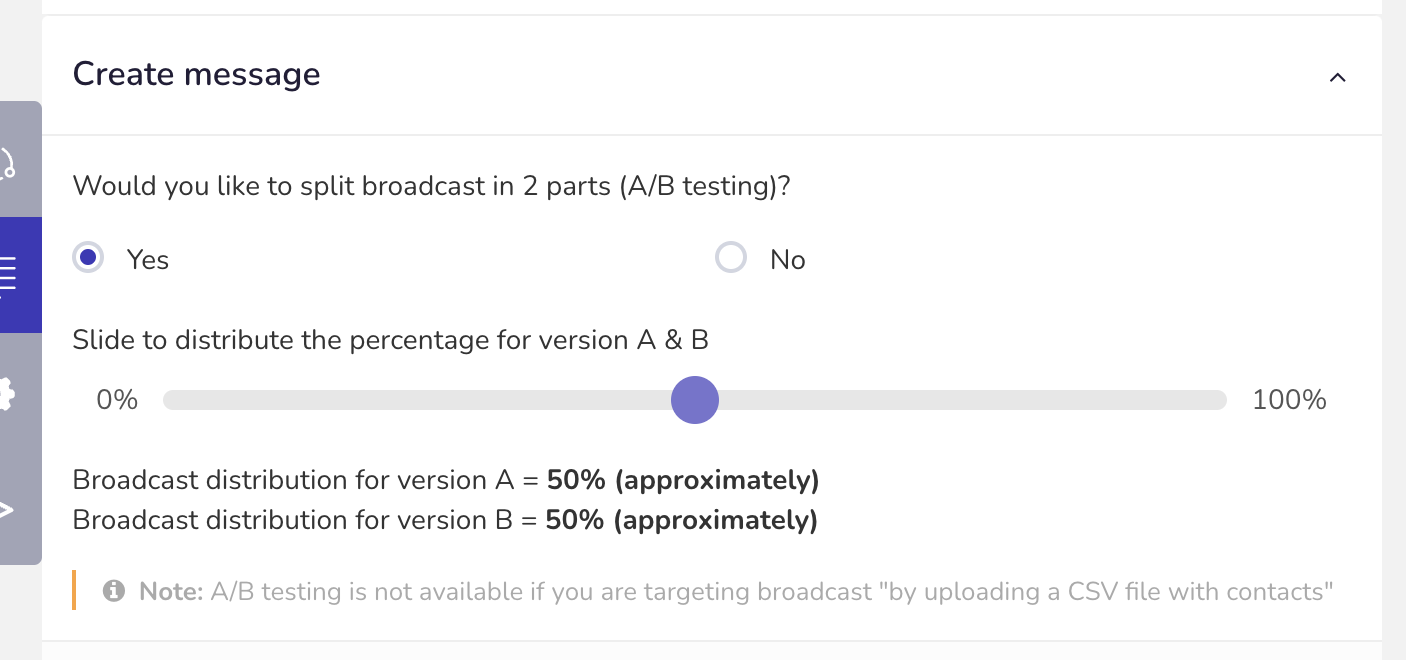
- Now under Create message, you will find the option to enable the A/B testing.
Once enabled you can select the slider to distribute your customers according to the percentage for A & B messages.
In the following example, the broadcast message will be evenly distributed between A and B broadcasts, each receiving a 50% allocation of customers.
i.e., if the number of customers is 10k, then both messages A & B will be distributed to 5K customers each.
Note: Please avoid selecting either the minimum as 0% or the maximum as 100% value on the slider scale. If you have such a use case, kindly select the “No” option for A/B testing.
Post selecting the distribution, now you can create your message below in Version A & Version B. You can create different messages for each version using the supported message types.
Example of version A & B messages:
Note: In case you have selected WhatsApp as messaging channel then you can select 2 different templates for A & B. - Post creating your message, now select the Target Customers who will be receiving the Broadcast using filters and conditions or using segments.
Note: CSV option is disabled for broadcast A/B testing.
Below is an example of Messenger Broadcast Settings. - Now, under the Scheduling section, you can specify when you want your broadcast to be sent, here you can choose between Send now or Send later options.
- Once you are done with creating and scheduling your broadcast, click on Save & Send.
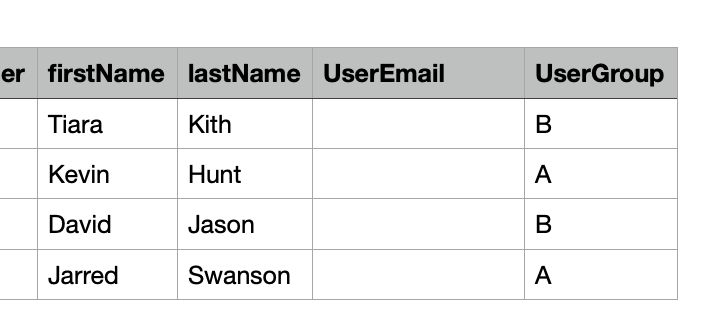
- Once your broadcast is sent, you can download the targeted customer list for your created broadcasts under the TARGETED CUSTOMERS (CSV) column by clicking on Download CSV.
In the downloaded file, you will find the column UserGroup, where you can identify the messages sent to your customers divided between versions A & B. - Once the broadcast is sent, the Broadcast outcome report (CSV file format) will be available to check the message status of all the customers targeted under the broadcast.
Note: “Broadcast outcome" is only supported on WhatsApp and will be available 30 minutes post-completion. Currently, Broadcast Outcome only supports 100K records and if records are more than 100K then please contact your account manager as we need to use Broadcast Outcome API.
In the CSV report, you will find columns for Broadcast Date, Broadcast tracker status, Broadcast Status, UserGroup (A & B), etc, where you can check the message status of all the customers targetted under the broadcast. - Now under Analytics >> Broadcast, click on the Broadcast Tracker AB testing tab to view the details of your broadcast.
Here you find the detailed comparison for both A & B versions, indicating which had a better response with additional information like failed status reason.
Find more details related to Broadcast AB Testing Analytics here.


Note: Additional comprehensive documents regarding broadcast, including channel-specific broadcast, and setting up conditions for the target audience, can be found here.
Articles in this section
- Google RCS Broadcasts
- Broadcast with SMS Failover
- Voice Broadcast
- Send WhatsApp broadcast messages with personalised media content for each recipient
- Instagram Broadcast (Beta - Limited access)
- Broadcast with A/B testing
- Telegram Broadcast
- SMS Broadcast
- Creating Line | GBM Broadcasts
- Detailed Explanation about Conditions for Broadcast & Segments