Objective
Editing weight-based shipping settings in Jumper.ai.
Applies To
- Jumper
- Shipping Settings
Procedure
- Once you have added a zone, click on ‘Edit Shipping Rates’ of the zone to manage your shipping rates.

- Click on ‘Add new shipping rate’ if you want to add new rate of weight based, if you have already added, then click on the edit icon of the added weight to manage your rates.

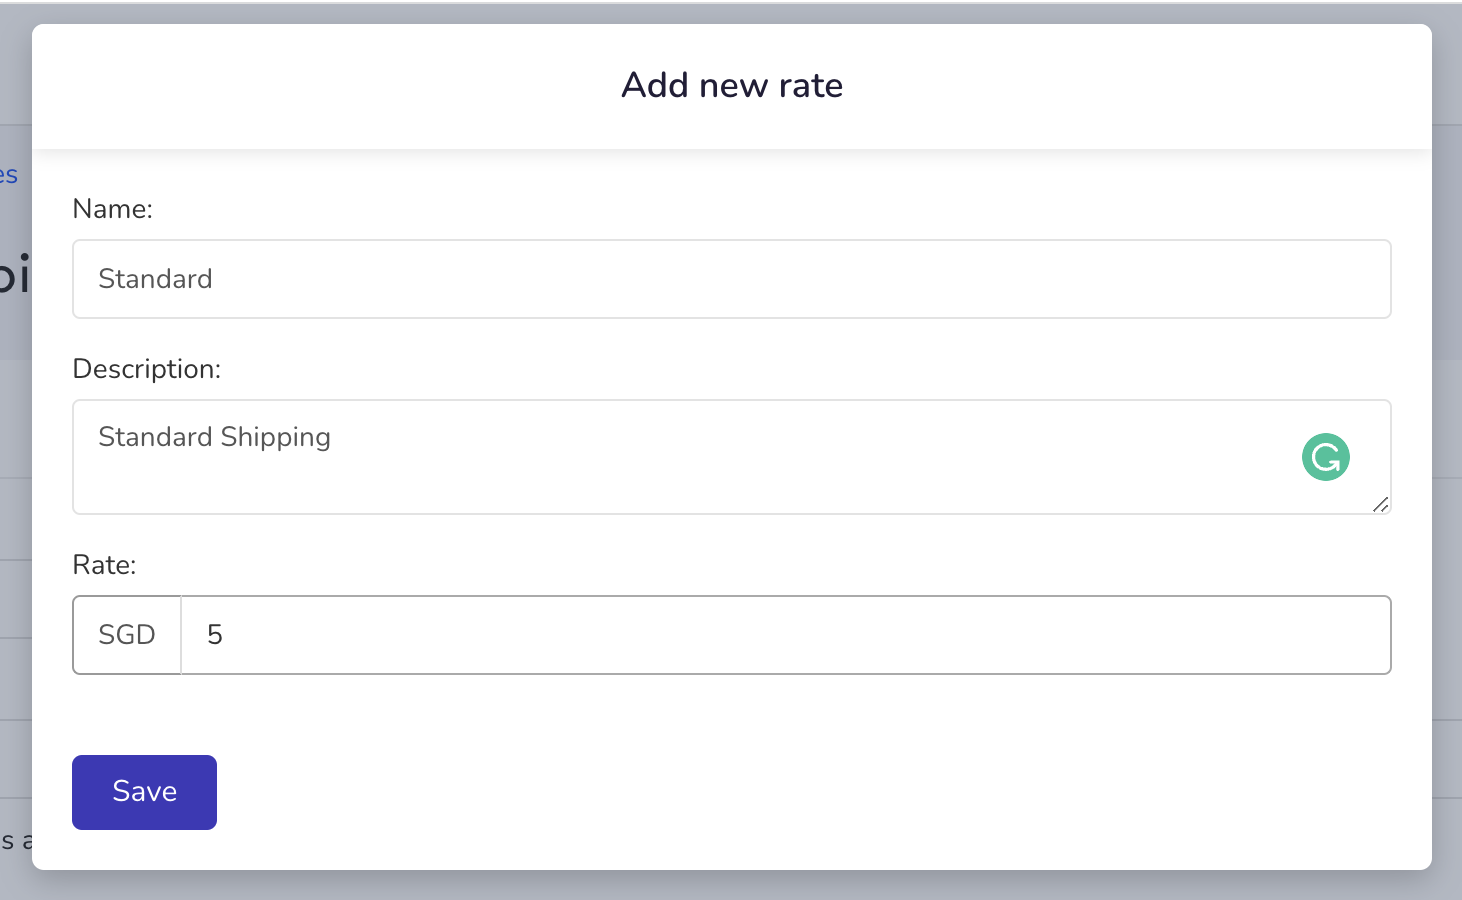
- Now click Add New Rate.
- Here, add the details of your required new rate and the amount, then click on Save.
- Now your new rate has been added. If you wish to add more rates, you can add multiple rates for shipping options.

- When you add multiple rates to this tier, it will give the choice to the user to choose between the two shipping options. This can be used for Standard and Express Shipping kind of options.

- If you want to set a tiered shipping fee based on Weight, in the Zone, perform Add New Shipping rate to set tiers and add Rates to each Shipping Rate.

Important Notes: When setting Shipping Fee by Weight, make sure that the Weight for your products in the catalogue is exact. Product weight will be used to calculate the Shipping Fee.
Only setup shipping settings for Tiers where a Shipping Fee greater than 0 applies (for example, if you want Free shipping above 10KG, you do not need to set the tier for 10KG and above).
Shipping Rates may be imported from other OMS/Fulfilment Partners such as Shopify if your account is setup with those integrations.